The recent FAQ changes have already sent huge ripples through the competitive metagame, and brought a host of Rebel ships back to the forefront. No longer running in terror from a plague of TIE Defenders or unpalatable Dengaroos, the plucky Rebel pilots have emerged from their hiding places and begun to take back lost ground.
As I join that resurgence in Rebel fleets I'm finding myself really enjoying the ARC-170. It's a ship I've already used a few times in the past, such as in my entertaining Ghost/Biggs/Thane squad or alongside Rey in her YT-1300. With the T-65 and T-70 X-Wings both proving a little too flimsy for battle at present the tougher ARC is proving it's worth as a real warhorse, but more and more I'm being struck by just how versatile and flexible the ARC platform can be. The ARC-170 is the only ship in the game to combine both Crew and Astromech upgrade slots and resourceful players are finding more and more ways to make that count with tricky or powerful combinations.
In this blog I want to look at how the four ARC pilots are finding a home in the new era of Rebel squads, and how players are maximising those unique upgrade possibilities.
Braylen Stramm
Braylen Stramm has two things going for him - he's cheap and sometimes he clears stress without needing to do a green maneuver (although as it's only sometimes it's difficult to plan for or build that into your strategy too much). Those two factors have combined to mean that, of all the four ARC-170 pilots, Braylenn is the one who has the most prescriptive uses...
- Braylen Stramm - Alliance Overhaul, R3-A2, Gunner (32pts)
About 80% of all Braylen lists in Listjuggler used this loadout, which I'm going to dub 'Stresscow' because it's a bit bigger than a classic 'stresshog' Gold Squadron Y-Wing. The objective of the two ships is very similar as both bring R3-A2 as their astromech and both are capable of firing twice in a turn (with Gunner or the BTL/A4 title) to double up on the stress. The Gunner means that 'stresscow' costs 6pts more than the Y-Wing 'stresshog' but with those points you're buying an extra point of hull, and most importantly a rear arc to throw stress out of as well as the front.
The reason you see this loadout on Braylen in particular is because it plays to his two strengths. Firstly if he's picking up two stress per turn then the fact that he's got a chance of shedding stress may matter, but most importantly the addition of R2-A2 probably makes Braylen the first target your opponent will pick on and so you just want the cheapest body available so you're not throwing away more points than you need to when he inevitable dies.
Personally I'm not a big fan of the 'stresscow' precisely because R3-A2 makes whatever he's on such a target that they tend not to last very long, so I'd usually prefer to bring the classic Y-Wing and spend 6pts somewhere else in the squad. What is interesting about this, though, is that the recent Stele Open winner brought us the debut of 'Stressy Jessy' (Jess Pava with R3-A2, Primed Thrusters, Integrated Astromech) and so it seems like there's maybe a sliding scale of how much you can spend on bringing R3-A2 to the table. At 32pts Braylen with Gunner is up at the top end of that, but as Jess Pava gave up on the double stress perhaps Braylen can lose the Gunner to save points and fill that crew slot with something else?
Hold that thought...
Of all the ARC pilots I have a real soft spot for Thane Kyrell because I just love his pilot ability! Taking two actions in a turn is the sort of thing people pay a lot of points for with Push The Limit, and there's also some great interactions around the timing of taking one of those actions in the middle of the combat phase. It's something that I've already exploited to use Jyn Erso to feed Focus to Biggs when I know there will be enemies in my arc, and there are some great other uses as well.
The obvious synergy with Jyn Erso (Thane's ability triggers when something is in your arc, Jyn needs people to be in your arc) means that she's probably the single most common upgrade on Thane Kyrell builds, including this one which did very well at the recent Tatooine Open as part of a four ship Rebel squad under the command of Daniel Alzueta Curto.
- Thane Kyrell - Alliance Overhaul, R3-A2, Jyn Erso (30pts)
So when we discussed Braylen Stramm's 'stresscow' I left you holding a thought about maybe not needing the Gunner and you could use something else instead? Well that's exactly what this is doing with the ARC-170 coming in cheaper than the 'stresscow' despite using Thane as a pilot over the cheaper Braylen. Daniel's list also featured Biggs Darklighter to act as a shield for Thane, and in return Thane fed focus to help keep Biggs alive with Jyn Erso... it's a beautiful friendship!
The versatility of the ARC-170 really gets highlighted in this next version of Thane Kyrell, which uses R2-D6 in the Astromech slot to add an EPT to the ship and really cash in on that free action with Expose!
- Thane Kyrell - Alliance Overhaul, Expose, R2-D6, Rey (33pts)
So with this loadout you can easily launch fully modified 4 dice attacks. Simple stack a couple of focus tokens on Rey in the early turns then move in to attack and activate Expose. When your opponent attacks a nearby ship you're free to take a Target Lock and unload with the whole lot. Pair this with Biggs Darklighter to ensure your opponent has to attack something else and you're laughing!
Thane's mid-combat action has other uses too - it's great for setting up a target lock for a Torpedo strike, for instance, and in this version that I've been using I take full advantage of that by equipping the crew/astromech combination of Weapons Engineer and M9-G8.
- Thane - Alliance Overhaul, Weapons Engineer, M9-G8, Plasma Torpedo, Guidance Chips (35pts)
Weapons Engineer and M9-G8 is a great combination that only ARC pilots can use as they're the onle ones with both slots available. You can either place your target locks on friendly ships to help improve your damage output, or on enemy ships to try and reroll their hits into blanks. I added the Plasma Torpedo in this example to give Thane some real bite in the first round of firing so he's not just a support ship but also bring some fight of his own.
I'm sure these lists above only scratch the surface of what Thane can get up to and almost any upgrade with an Action: tag is worth at least thinking about for whether Thane can take advantage or not. The biggest trick is ensuring that he's riding alongside something else (Biggs, Stresshog etc) that's drawing all the attention in the early game so you got those free actions!
Norra Wexley
Wait a minute, did I forget about Shara Bey? No, but I'm leaving her to last because I want to talk about Norra Wexley first. Get over it.
Norra Wexley (mother of 'Snap' Wexley from The Force Awakens) is a straight up brawler. Big Momma Wexley has a fantastic pilot ability that allows her to punch well above her weight, and also allows her to stick around on the table a bit longer than usual. Unfortunately to use Norra's ability properly you'll need two actions in a turn - one to throw down the Target Lock and a second to give you the Focus token you'll need.
That requirements means that the vast majority of Norra Wexley lists are wedded to Push The Limit as her Elite Pilot Talent, and then work out from there.
There's really two 'families' of Norra Wexley players and it's the Astromech slot that divides them. Because Push The Limit is going to leave Norra stressed every turn she's going to spend a lot of time doing green maneuvers, and that opens the door to two iconic astromechs...
That's right, ladies and gentlemen, it's R2-D2 vs BB-8!
"Iiiiiiiiiin the BLUE corner, weighing in at 32 kilograms and standing 3 feet 7 inches tall. It's the Artoo from Naboo, the 'mech you can't wreck... Artoooooo Deeeeeeeeeeetoooooooooo!
And the challenger, fighting out of the ORANGE corner. Weighing 18 kilograms and rolling in at 2 feet 2 inches. He's backu from Jakku and here to prove that size matters not, so give a big thumbs up for... Beebeeeee Eeeiiiiiiiiiiiiiiiiighttt!"
R2-D2 gives you 'regen Norra' while BB-8 creates what has been dubbed 'agility Norra' and it's worth paying a little bit more attention to because of just how BB-8 interacts with Push The Limit. Agility Norra can reveal a green maneuver then use BB-8 to perform a barrel roll and THEN use Push The Limit to perform an action (Focus/TL) and generate stress. This all happened before you actually performed the green maneuver, though, so now you move and clear the stress and get to take yet another action. While R2-D2 Norra uses Push The Limit to TL/Focus and end the turn stressed, BB-8 Norra can TL/Focus/Barrel Roll and end the turn unstressed so that her options are wide open on the next turn.
BTW: the potential of BB-8 and Push The Limit was something I touched on in this very early blog about Poe!
The downside to Agility Norra over Regen Norra, of course, is that the added maneuvering of BB-8 is essential to avoid her taking too much damage because without R2-D2 she's no way of regenerating any lost shields.
The BB-8 Norra has plenty of tricks but it's the sheer reliability of trusty old R2-D2 that keeps players coming back to him time and time again.
With powerful synergies already being locked up in the Elite Pilot Talent and Astromech slots players often have a pretty free hand in what to use in Norra's Crew slot. C-3PO is frequently reunited with his counterpart R2-D2 to make Norra even tougher to bring down than she already is, while other choices might maximise the danger of her rear arc with Tail Gunner, or look for even more Focus tokens with Rey or Kyle Katarn. The final piece of the puzzle is often the addition of Vectored Thrusters. The ARC's achilles heel is a weak dial with poor options for turning around, especially when Push The Limit leaves you stressed and unable to K-turn - even more so if you're wedded to green moves - and Vectored Thrusters gives you essential options for how to handle those turns or for keeping opponents in your rear arc as you grind around the board.
- Norra Wexley - Alliance Overhaul, Push The Limit, Kyle Katarn, R2-D2, Vectored Thrusters (41pts)
Above is a pretty straight forward Regen Norra build as an example, with Kyle Katarn ensuring that Norra gets a Focus token even if she uses one of her Push The Limit actions to barrel roll and reposition her arcs. This type of Norra Wexley build is pretty self-sustaining so you see it plugged into a bunch of different lists - I've seen it supporting Rey, for instance, and I've seen it running alongside three Snap/Crack A-Wings (with Rey crew subbed in for Kyle Katarn to save a point). It's not an immediately obvious comparison to make but I think that 'Regen Norra' is to the Rebels what Whisper's TIE Phantom is to the Imperials - a ~40pts standalone ship that can be relied upon to deal a fair chunk of damage whilst also defending itself (with regen or cloaking). Not obvious to put those two pilots in the same pigeon box but, yeah, I think they've got a lot more in common than you'd immediately expect.
Although the battle of the astromechs has been overwhelmingly won by R2-D2 in terms of the number of players using him, it was an Agility Norra with BB-8 that recently surprised many players when John Procter won the Stele Open...
- Norra Wexley - Alliance Overhaul, Push The Limit, Kyle Katarn, BB-8 (37pts)
The killer trick in John's list wasn't just his Norra loadout, though. What was really clever was how it worked in synergy with the rest of his squad and, in particular, with Shara Bey in a second ARC-170...
Shara Bey
According to meta-wing.com Shara Bey is the least popular of the four ARC-170 pilots, played only roughly half as often as either Thane Kyrell or Braylenn Stramm, and fully 80% less than the main gun Norra Wexley. I think the main reason for this is that Shara Bey is almost never the first ARC you put into a list and instead she usually supports another ARC. You can put Braylen in as a standalone Stresscow, you can add Thane to support Biggs, Norra is rough and tumble and can go with anything but Shara... Shara is the shy quiet one that likes to sit in the shadow of her more gregarious friends.
Shara probably competes most closely with Thane Kyrell for the role of 'support ARC' and what she's mostly got going for her over Thane is that native EPT slot. Yes there are Thane builds that use an EPT with R2-D6 but if you want to pack a decent Astromech as well then Shara is your girl. That's what veteran UK player Rasta Maice used to his advantage last year when he took Norra/Shara/Biggs to victory in a large community tournament last year...
- Shara Bey - Alliance Overhaul, Draw Their Fire, Weapons Engineer, R2-D2 (36pts)
Alongside Shara Bey's EPT slot the other main reason for bringing the Bey is her ability to contribute target locks for the rest of her team. That's what makes Weapons Engineer one of the most common upgrades on Shara builds, and it's also what makes her such a good partner for Norra Wexley as it more easily allows Norra to use her Target Lock/Focus combination on defense as well as attack.
That partnership with Norra Wexley was taken one step further by John Procter's Stele Open winning list, with Shara almost acting as big sister to Norra...
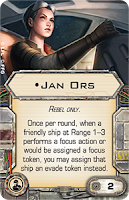
- Shara Bey - Alliance Overhaul, Adaptability, Jan Ors, R2-D2 (34pts)
If you remember the 'Agility Norra' that John used was lacking regenerating shields as he packed BB-8 not R2-D2, well that was all fine because Shara Bey had Norra's back and gave a sort of regeneration by proxy by Jan Ors feeding an Evade token into Norra for her second Focus token that she got from Kyle Katarn. It made target priority trickier - did you try and shoot the slippery agility Norra Wexley despite her Evade token, or did you accept having to chew through Shara Bey and her regenerating shields before you could start on Norra?
As I said at the top there's a reason why Shara Bey is the least loved ARC pilot, but there's also no doubt that she can make an excellent wingman (Wingmaam?) for her buddies!
So there you have it - ARCs may not be sexy but they sure are proving useful and earning their corn among the very best ships the Rebels have available. They can be powerful warhorses, stress-dealing frustrations or tactical support ships, they can operate independently or in tandem with other ARCs. With their unique upgrade slots they can do just about anything, in fact!
I'm already a big fan of the ARC-170 platform, are you?
EXAMPLE ARC-170 SQUADS
EXAMPLE ARC-170 SQUADS
Rasta Maice - Nerf Herder Open 2016 (UK) - WINNER
- Norra Wexley - Push The Limit, Kyle Katarn, R5-P9, Alliance Overhaul (38pts)
- Shara Bey - Draw Their Fire, Weapons Engineer, R2-D2. Alliance Overhaul (36pts)
- Biggs Darklighter - R4-D6, Integrated Astromech (26pts)
Daniel Alzueta Curto - Tatooine Open 2017 (Spain) - TOP 8
- Captain Rex
- Roark Garnet - Twin Laser Turret, Jan Ors
- Biggs Darklighter - R2-D2, Integrated Astromech
- Thane Kyrell - Jyn Erso, R3-A2, Alliance Overhaul
John Procter - Stele Open 2017 (USA) - WINNER
- Norra Wexley - Push The Limit, Kyle Katarn, BB-8, Alliance Overhaul (37pts)
- Shara Bey - Adaptability, Jan Ors, R2-D2. Alliance Overhaul (34pts)
- Jess Pava - R3-A2, Primed Thrusters, Integrated Astromech (28pts)
"Duck Duck Goose" - Various Tournaments
- Braylen Stramm - R3-A2, Gunner, Alliance Overhaul (32pts)
- Norra Wexley - Push The Limit, C-3PO, R2-D2, Vectored Thrusters, Alliance Overhaul (41pts)
- Biggs Darklighter - R4-D6, Integrated Astromech (26pts)


